
Something you will hear us ask for often in our line of work is a high quality PDF file of the publication or artwork that you are wanting to print. While many of you are probably experts by now in wielding the power of the PDF, it never hurts to have a refresher on how to make a high quality, print ready PDF in InDesign; as well as what a PDF actually is.
What is a PDF?
The acronym PDF actually does have a meaning; it stands for Portable Document Format. It essentially is a way for you to send a file that has all the essentials of the content embedded within it, so that it can be viewed separately from the software or application it was created with. Just about anyone has the ability to open PDF files in this day and age, and the few that can’t often have the ability to remedy within a few easy steps.
The greatest thing about a PDF, and often why we ask for it rather than your original creative software files (InDesign, Quark, Publisher, etc.), is that everything you used is coded into the file. For instance, if there is a font that you used in your publication that we don’t have in our systems, we can still use your font because the coding for it is within the file. Conversely if you were to send just an InDesign file, there would be no guarantee that we would have the font you used and our computers would most likely try to find some type of substitute for it.
Additionally, PDFs are a compressed version of your work, so it is often smaller in size (by which I mean how much space it takes up on your harddrive) than all the files you used to make the publication to begin with. Which, of course, means it takes less time to send your file to our servers (depending on your bandwidth and network settings), or even to keep on a flashdrive or backup system for your own purposes.
How do I create a High Quality PDF within InDesign?
I’m glad you asked!
It is a little tricky, so make sure you follow each step exactly as it’s written:
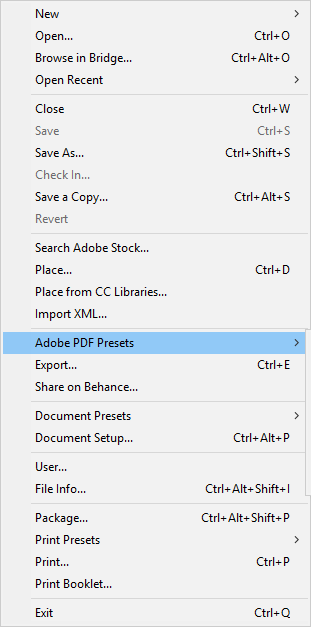
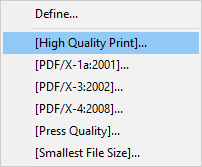
1. In your completed InDesign document select File > Adobe PDF Presets > High Quality Print
2. Choose the location and name of your Save.
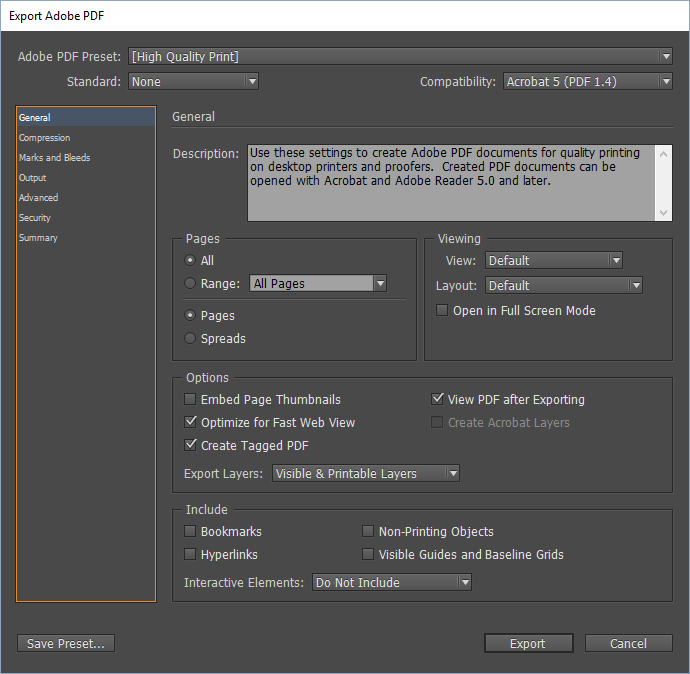
3. Make all adjustments needed in your Export Adobe PDF Window
- Make sure that the pages button is selected (or spread checkbox is unchecked) under the pages section
- It is recommended that you select View PDF after Exporting checkbox for ease of use.
- If you have any Marks and Bleeds in your document be sure to select Use Document Bleed Settings check box under the marks and bleeds tab.
4. Select Export and wait as the magic happens (it may take a minute).
5. Review your PDF to make sure it has everything you want in it.
6. Bask in the victory of creating such a superb publication.
And that is all there is to creating a High Quality PDF in InDesign. I guess I should let you know I was kidding about the difficulty.
Until next time!
Austin


