Bleed is a printing term that refers to printing that goes beyond the edge of the sheet before trimming. In other words, the bleed is the area to be trimmed off. Read more here.
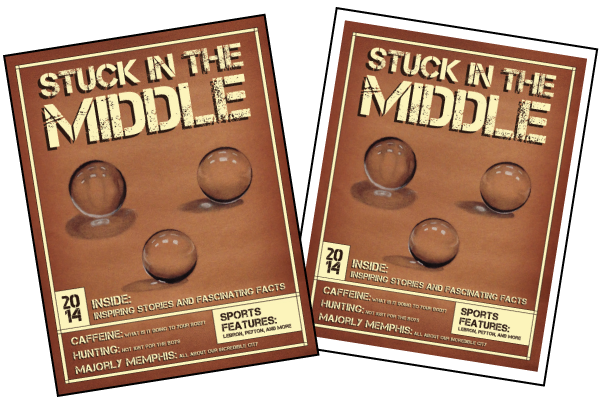
The publication on the left has bleeds.
Set up your publication for bleeds in Adobe Indesign.
1. Open your InDesign document and go to File > Document Setup
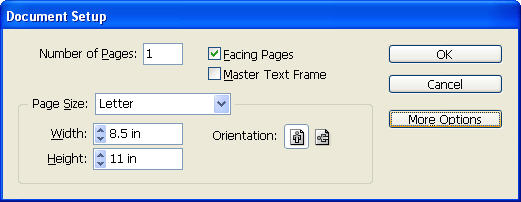
2) If you do not see the Bleed and Slug section, select the More
Options button.
3) In the Bleed and Slug section, set all fields to .125” and click OK.
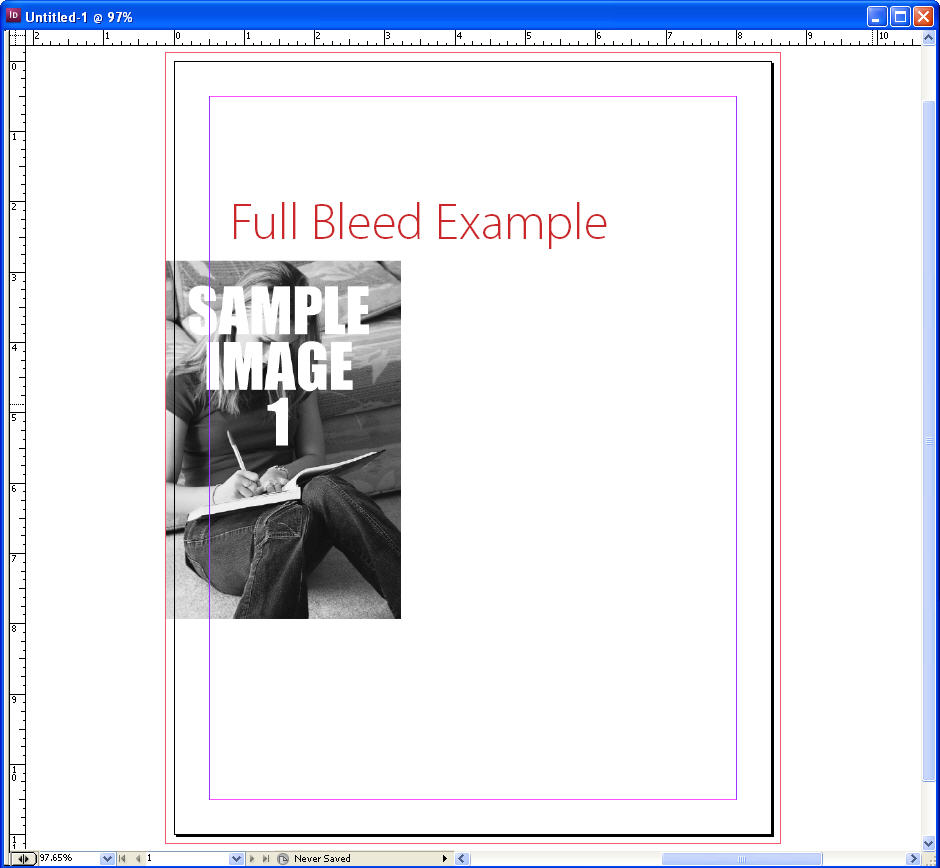
When creating bleeds, we recommend that all text remain within the .5” margin, unless this is a chosen design style. When working with bleeds, all content that should bleed must be extended .125″ beyond the page edge. This portion will be trimmed after printing.

4. A red line will appear on the outide of your page area. All content
that should bleed off the page should extend to this red line. Note that
anything that extends pages the black page boundary will be trimmed
off in production.
5. When creating your PDF, be sure to choose the Use Document Bleeds
Settings option in the PDF options window under the Marks and Bleeds
section. See TechKnow lesson: Creating a PDF for more information on
how to create a PDF with bleeds.